|
To create a seating plan for your event, log into the Paysera Tickets Event Management self-service, select the event that requires a seating plan. In the event creation and editing window, you'll see a section titled "Seat selection".
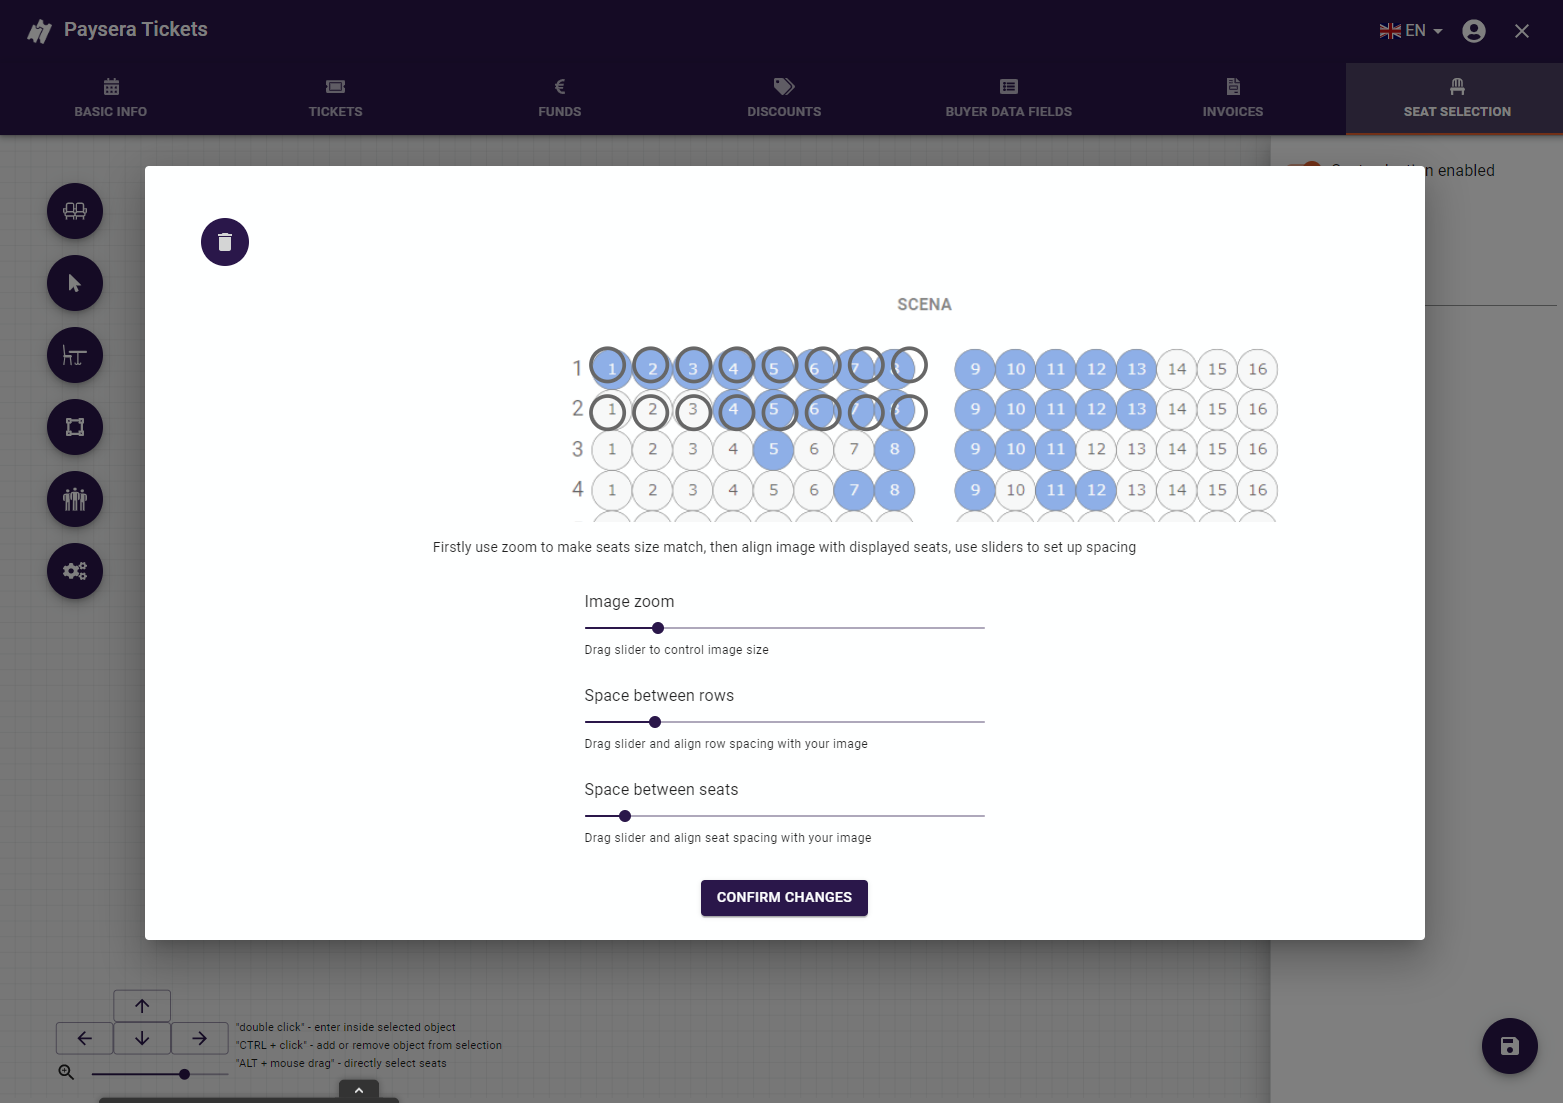
You can use a reference image to create a plan or continue without it. If you have chosen to create a seating plan based on your image, you can adjust the spacing between the rows and seats, zoom in or out the image using sliders below.
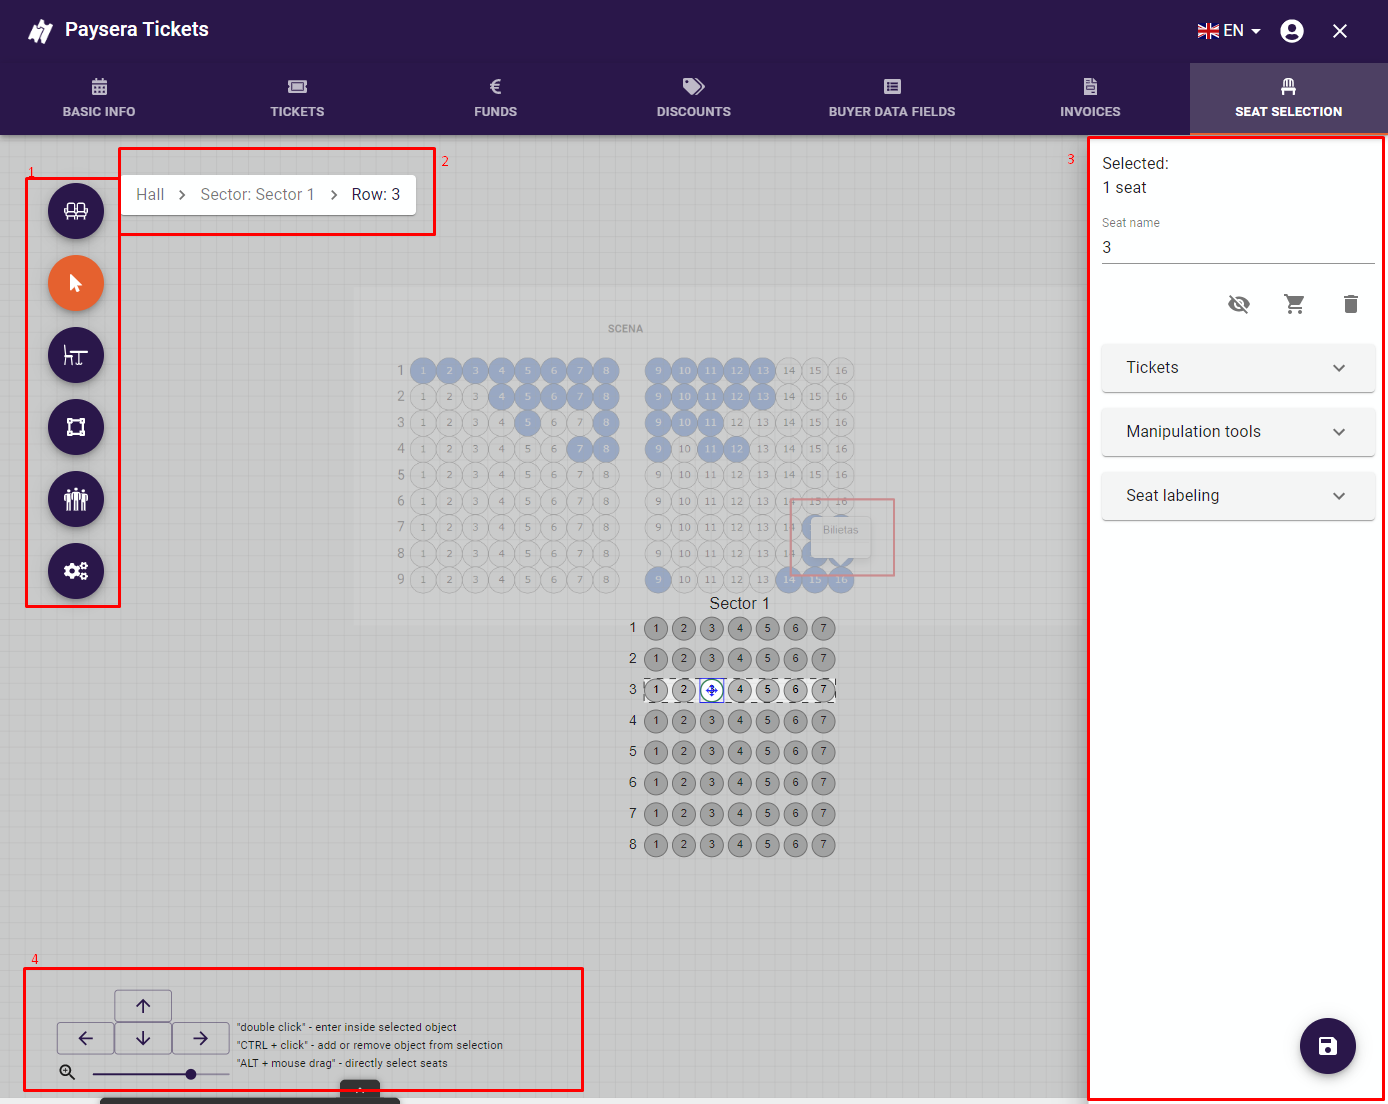
Window Structure
The main items of the seats drawing tool window are:
1. Toolbar
The Toolbar consists of action groups marked with corresponding icons:
- Seats Drawing Tool
- Selection Tool
- Table Drawing Tool
- Shapes Drawing Tool
- General Admission Drawing Tool
- Settings
2. Items navigation bar
The Navigation Bar appears when you use the Selection Tool to navigate between different items, for example, double-click to enter a sector or click on a sector row to enter it. The navigation bar displays links to a higher-level item. An item of the chosen level is selected by clicking on one of the links.
3. Object control bar
When you select an object, a control bar containing tools for controlling this object opens on the right side of the window. Clicking on an empty area of the window (not on the object) closes the bar.
4. Help bar
The Help Bar shows Tips for Hall and Object Control regarding how to control objects using the keyboard and a hall zoom slider.
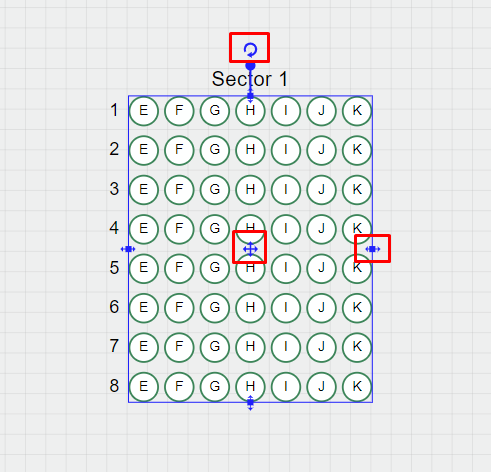
Drawing a Seating Sector
Once you have selected a drawing tool in the toolbar, use the mouse to draw a sector of your desired size. It will be pre-filled with seats. As you draw a sector, you will see the number of rows to the number of columns at the top of the outline.
When you release the mouse button, the drawn sector remains selected. You can also select a sector by clicking on the selection tool in the toolbar.
When a sector is selected, you can perform the following actions:
• move a sector - hold down the four-way arrow and move the sector in a desired direction;
• zoom in / out of the sector - drag one of the sector borders to add or remove rows and / or columns;
• rotate the sector - use the mouse to hold down the rotation arrow and drag the sector in the direction of a desired angle of rotation.
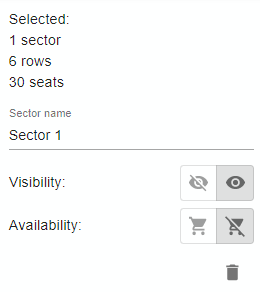
Seating Sector Control
When a sector is selected, a Sector Control Bar opens on the right. Here you can:
• change the sector's name;
• make all areas of the sector unavailable to buyers;
• set the visibility of sector seats by type of ticket;
• delete the sector.
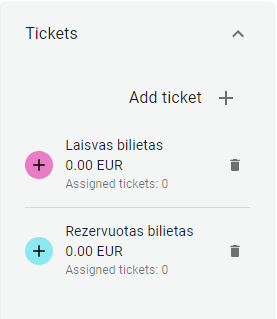
In the Ticket Assignment section, you can:
• assign a ticket type to a sector;
• create a new ticket type and assign it to a sector;
• delete a ticket type.
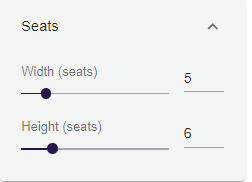
In the Seats section, you can:
• add chairs in each row (they are added left to right);
• add an additional row (an additional row is added to the bottom of a sector).
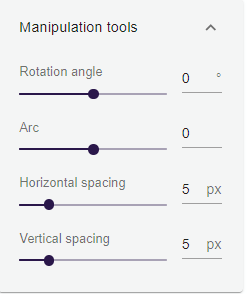
In the Manipulation Tools section, you can:
• rotate a sector;
• shape a sector;
• set horizontal spacing between sector seats;
• set vertical spacing between sector rows.
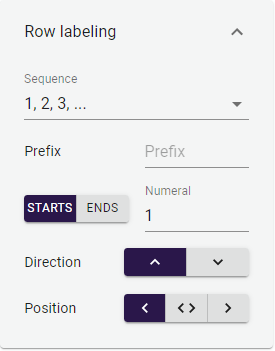
In the Row Labelling section, you can:
• set the row labelling order;
• add a prefix to row labelling;
• set start or end numbering and a starting character *;
*If you choose alphabetic or Roman numbering, enter the sequence number of the character, from which you want to start the numbering in the starting character field. For example, to start numbering with E (E, F, G, etc.), enter 5 in the starting character field, since E is the fifth letter of the alphabet;
• set the direction of row numbering;
• set the numbering position: left, right, or both sides of the sector.
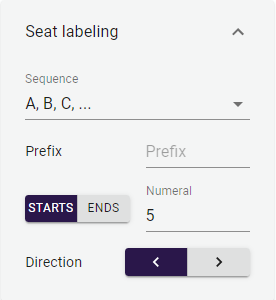
In the Seats Labelling section, you can:
• set the row labelling order;
• add a prefix to the seats labelling;
• set start or end numbering and a starting character;
• set the direction of seats numbering.
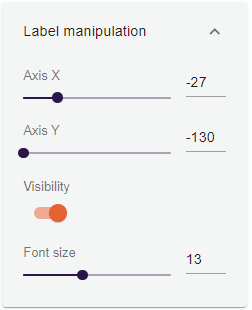
In the Sector Label manipulation section, you can:
• change the name position on the X (horizontal) axis;
• change the name position on the Y (vertical) axis;
• set the visibility of the name;
• change the font size of the name.
Navigation between Seating Sector Items
After you select the needed sector using the selection tool, double-click to open the sector. Here you can manage specific rows by clicking on them.
A selected row can be assigned a different type of ticket than the rest of the sector.
Using manipulation tools, you can do the following:
- rotate the sector;
- shape the sector;
- increase spacing between the seats of the row:
- increase or decrease the number of seats in the row.
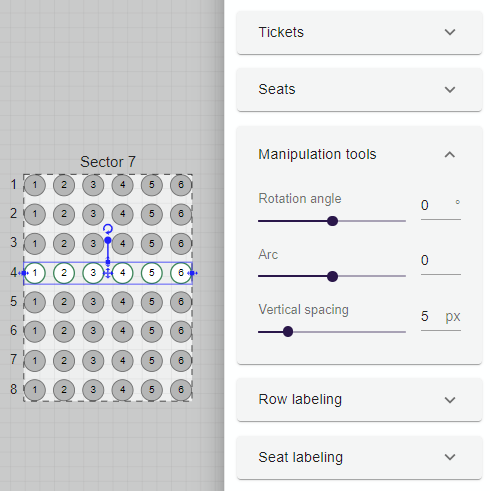
Managing Row Labelling and Seat Labelling of a selected sector row is similar to managing the entire sector. This means that the selected row may have a different numbering and starting character, as well as a different seat numbering, than the entire sector to which the row belongs.
Double-clicking on a desired row takes you inside the row. Here you can manipulate specific seats. Select a desired seat with a single mouse click. To select more than one seat, hold down the Ctrl key and select seats by clicking on them.
Seats can be assigned other ticket types than those assigned to the row or sector. In the Manipulation Tools section, a seat can only be rotated inside the row.
The Seat Labelling section allows you to set a separate numbering and labelling for a seat.
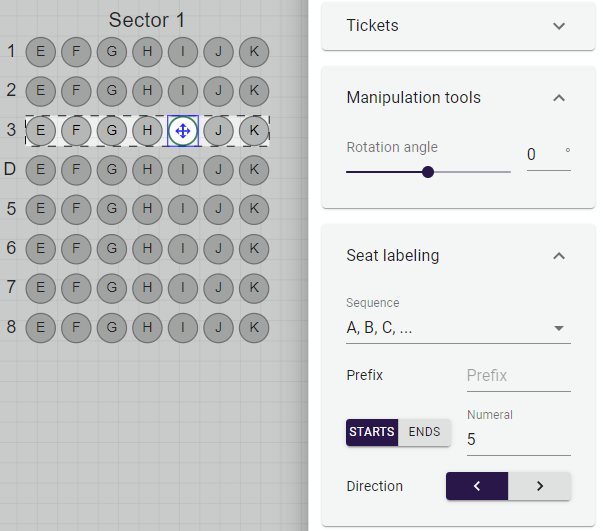
The current depth in respect to the Hall is indicated by the navigation bar at the top of the window. Clicking on one of the icons takes you inside that object.
Table Drawing Tool
Choose the type of table you want to draw: rectangular or round.
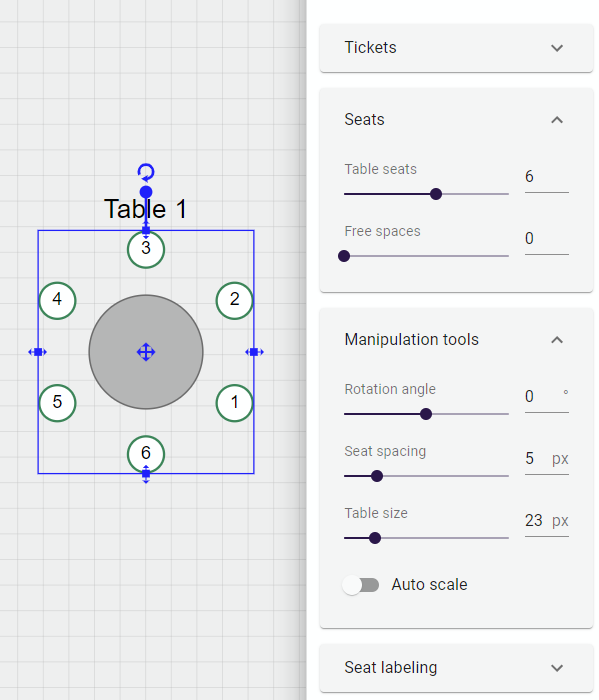
The standard round table has six seats. After you draw a table, the table control bar on the right side of the window opens. As with drawing the regular sector, here you can change the name of the table, make table seats unavailable to buyers, set the visibility of table seats by ticket type, or delete the table.
In the Ticket Assignment section, you can:
• assign a ticket type to a table or seat of your choice;
• create a new ticket type and assign it to a table or seat;
• delete a ticket type.
In the Seats section, you can:
• increase or decrease the number of table seats;
• set the size of empty space around the table.
In the Manipulation Tools section, you can do the following:
• rotate a table;
• set the distance between seats;
• set the size of the table;
• Auto scale - chairs are automatically added or removed (depending on the size of the table), when adjusting the table size using the manipulation or transformation tools.
In the Seats Labelling section, you can do the same things as in the regular sector. You can change the position of the name of the table in the same way as in the seating sector.
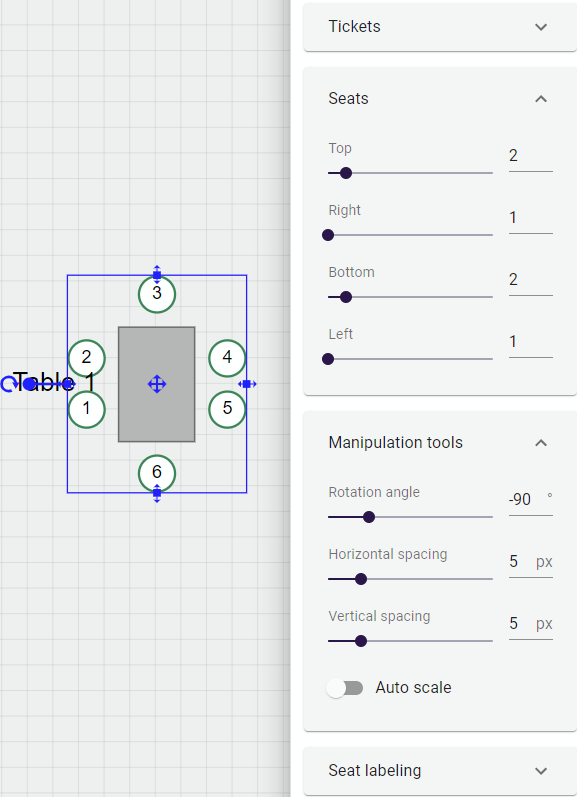
The standard rectangular table also has six chairs. The rectangular table settings allow you to rotate the table and position chairs at different sides of the table.
Shapes Drawing Tool
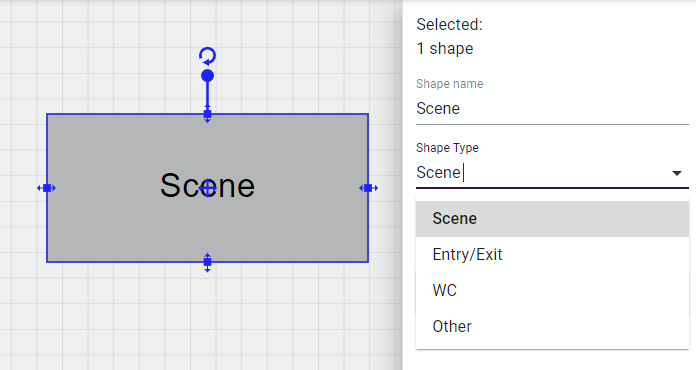
With the shape drawing tool, you can draw a rectangle of a desired size. Use the tools in the Shape Control Bar to give the rectangle a name, select its type, and control the position of the shape name.
General Admission Drawing Tool
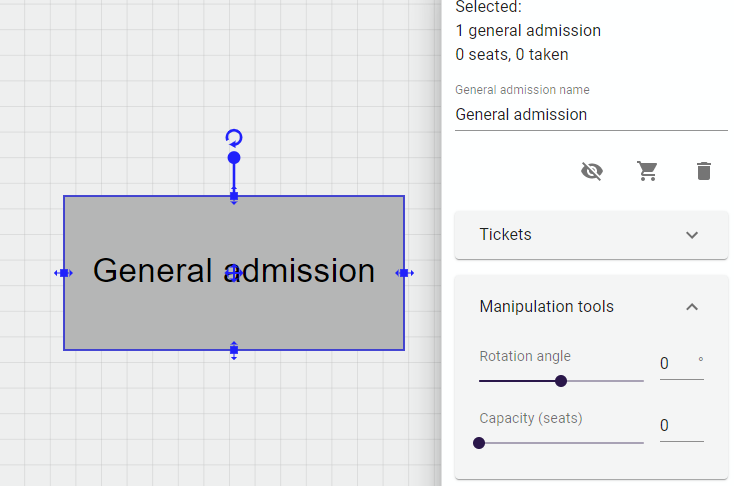
With the General Admission Drawing Tool, you can draw a rectangle of a desired size to mark the general admission area. In the sector control bar, you can name the sector, make it unavailable to buyers, set the sector's visibility by ticket type, or delete the sector.
In the Ticket Assignment section, you can:
• assign a ticket type to a sector (general admission can only have one ticket type);
• create a new ticket type and assign it to a sector;
• delete a ticket type.
In the Manipulation Tools section, you can rotate a sector and set the number of standing positions in the general admission area. In the name section, you can change the position of the sector name and the font size.
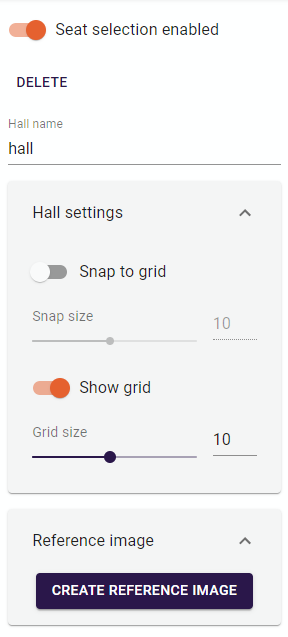
Settings Tool
Using the Settings Tool, you can give a hall a name or delete it in the control bar.
Here you can create a seating plan and make it invisible to buyers during the process of purchase.
In the Grid Control section, you can:
• select or snap moving objects to the grid;
• show or hide the grid and set its size.
In the Reference Image Control section, you can:
• upload an image (if needed);
• choose whether to display an image that has already been uploaded;
• adjust the image size by zooming in or out;
• set the position of an image on the screen;
• remove an image;
• adjust spaces between the seats and rows based on the uploaded image.
Controlling an Event with Seat Selection
You will not be able to save an event with seat selection, unless all sectors have ticket types assigned.
Ticket types that are created on the drawing canvas will also be displayed in the ticket creation window, so there is no need to go back and create new ticket types.
The amount of tickets of a specific ticket type depends on the number of seats available in the sector(s) assigned to this ticket type. For example, if you assign a ticket type to a sector with X tickets, you will not be able to change the number of tickets in the ticket creation window.
Ticket types in an event with seat selection that do not belong to any sector will not be visible to buyers. For example, to generate invitations, you need to create a sector or mark rows or seats in an existing sector that would only be accessible to the cashier. This way, buyers will not be able to purchase these tickets or even see such sectors / seats, and the event administrator will be able to generate an invitation with a seat indication.
|