|
10.15. How to enable the VAT invoicing feature?
|
|
|
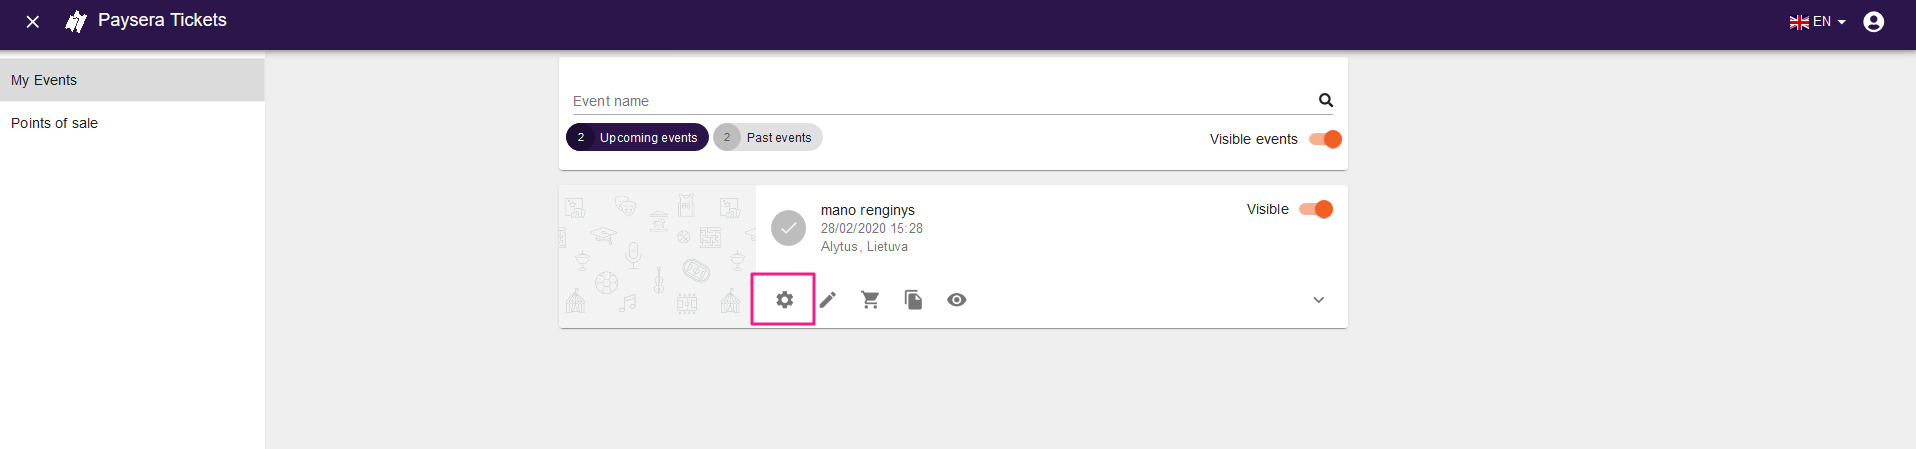
Create an event and enable the VAT invoicing feature in the Paysera Tickets event self-service. Step 1Create an event and go to the event self-service.
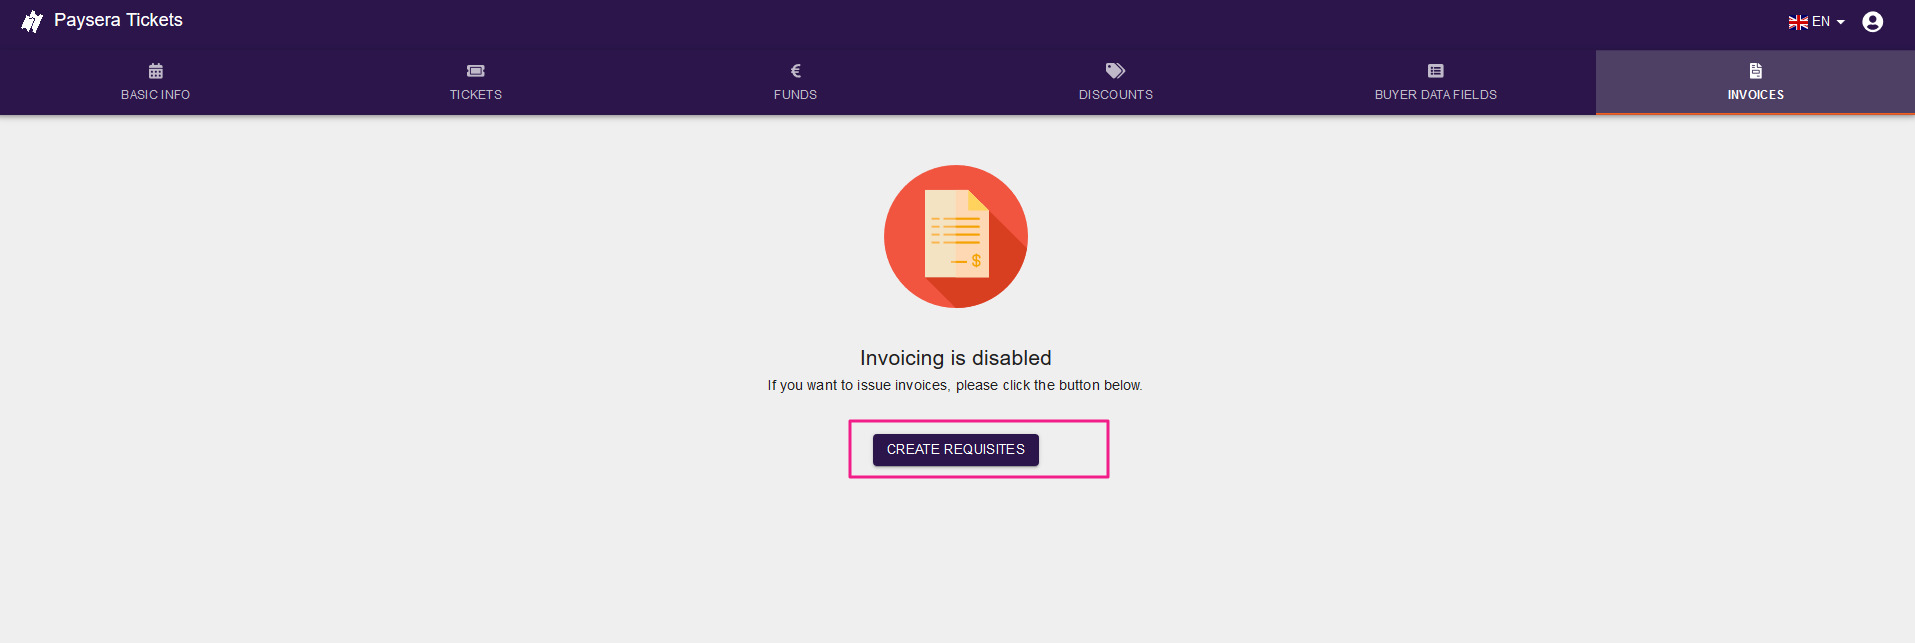
Step 2Enable invoicing
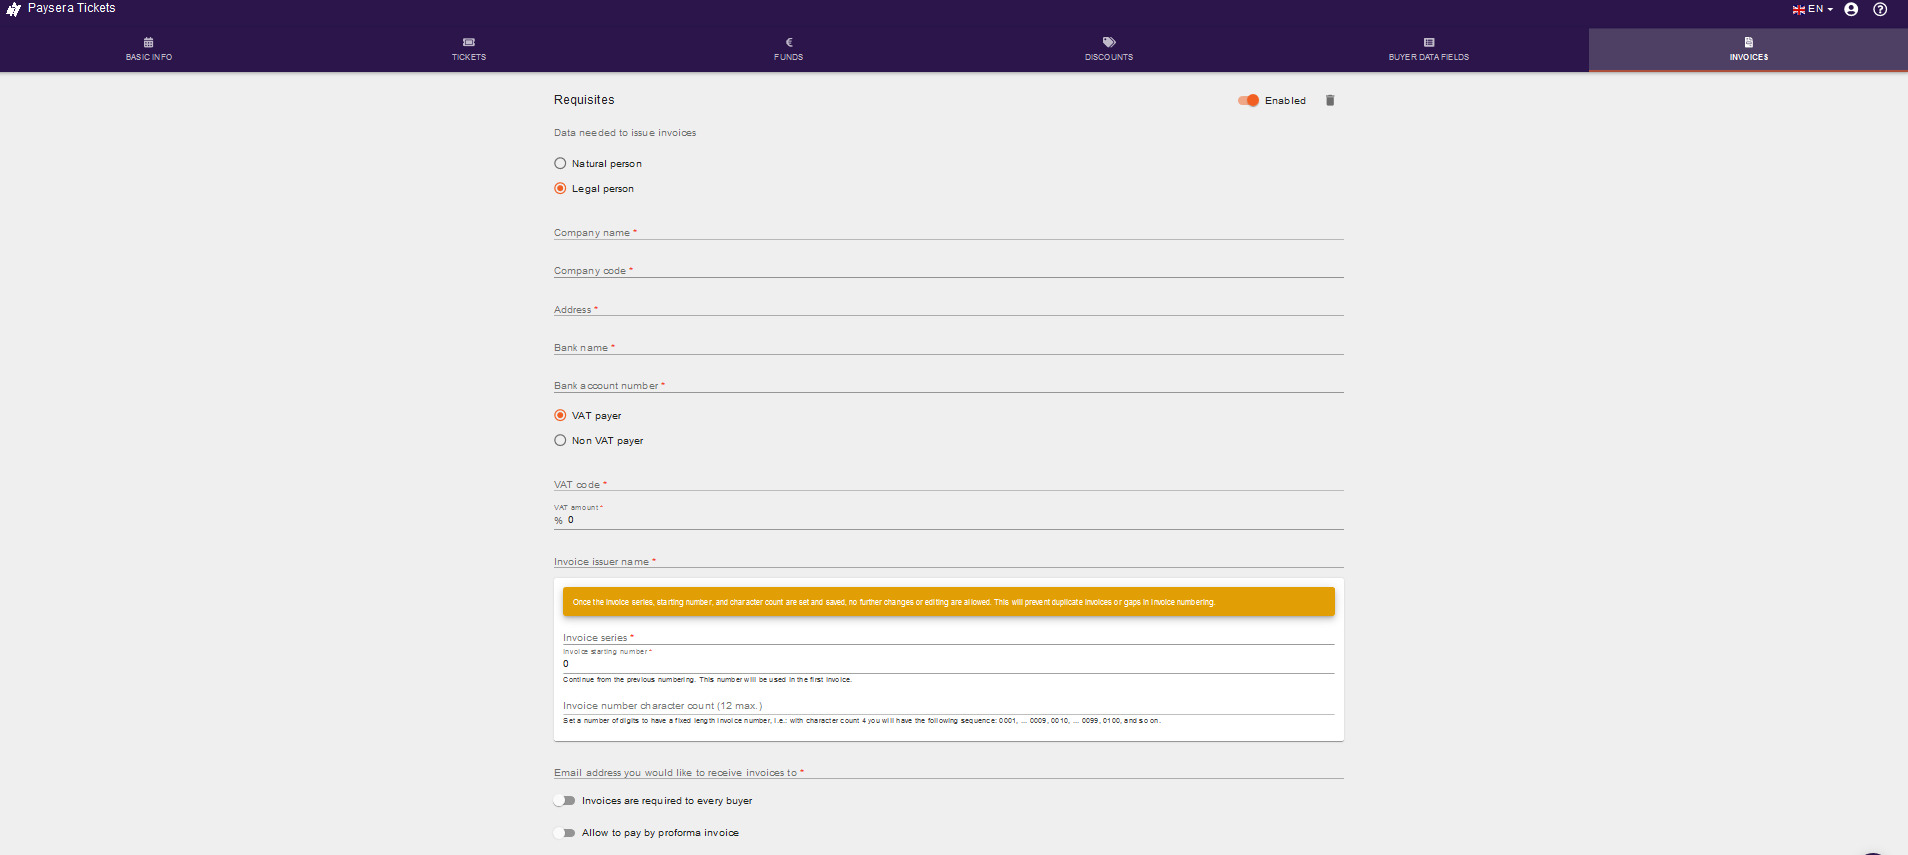
Step 3Fill in VAT invoice details. When filling in the invoice details in the self-service of the event, you may select additional settings for numbering of invoices. You may continue the series of invoices of the previous event and select the number from which the numbering of the event invoices should start. The number will indicate the first invoice of a new event. To place the minus (-) symbol between the invoice series and the number, at the end of combination of the serial number and/or letter insert the minus symbol, for example: LT2019-. You may determine the length of the invoice number. The series of the invoice is not included into the limit of characters. For example, if you enter the invoice number limited to 6 digits, empty values of the number will be displayed as zeros (0). The first 6 (digit) character invoice number will be as follows: series-000001, the hundredth invoice number will be as follows: series-000100, etc. Note! After entering and saving additional settings of invoice number, these fields will not be available for editing or deleting. This will help to avoid duplicates and gaps in invoice numbers.
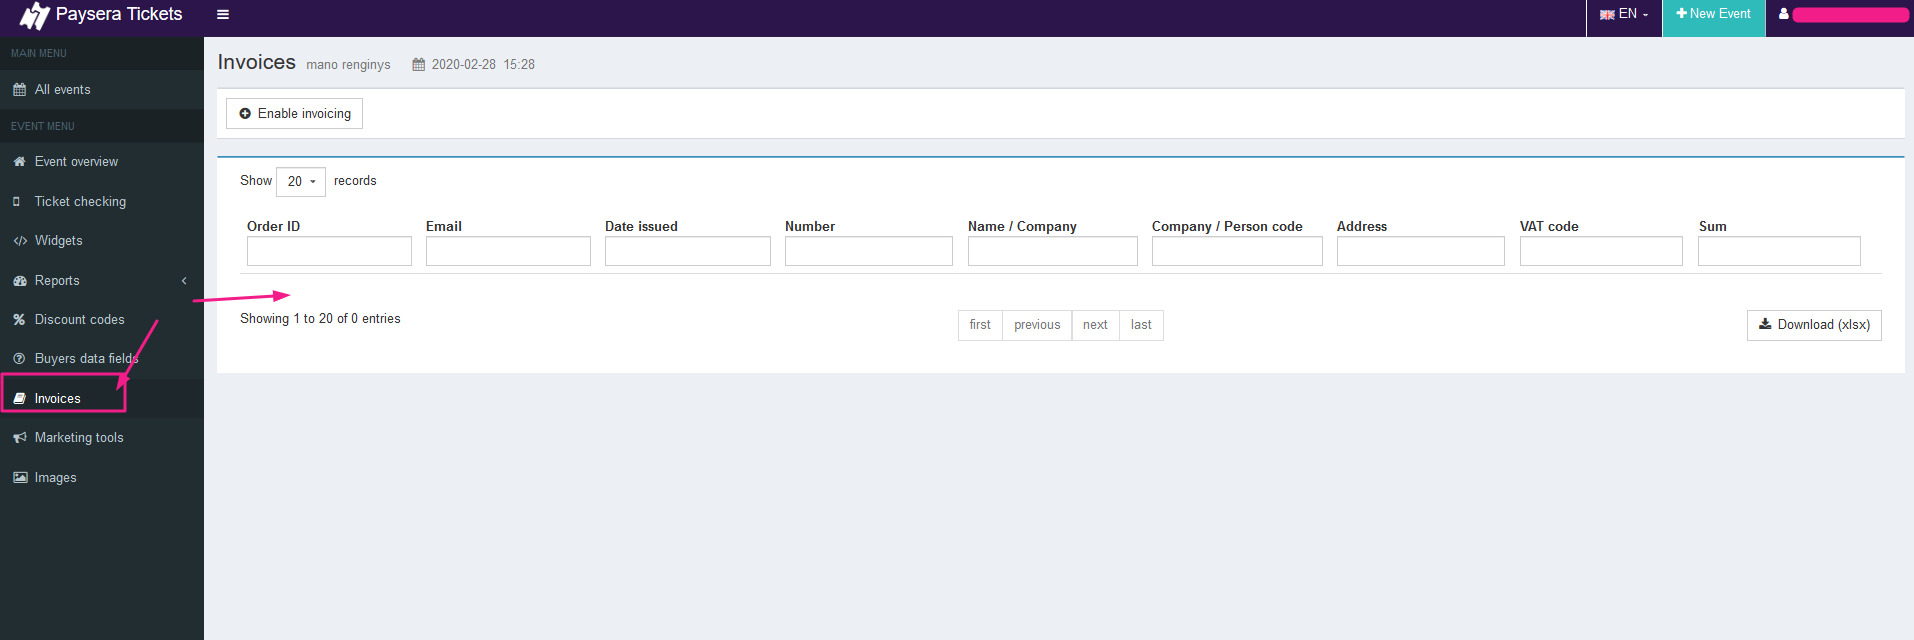
Great! The VAT invoicing feature is enabled. You can see all the VAT invoices issued in the report provided below.
| |
|
|